Crepe Paper Orchid - Cattleya
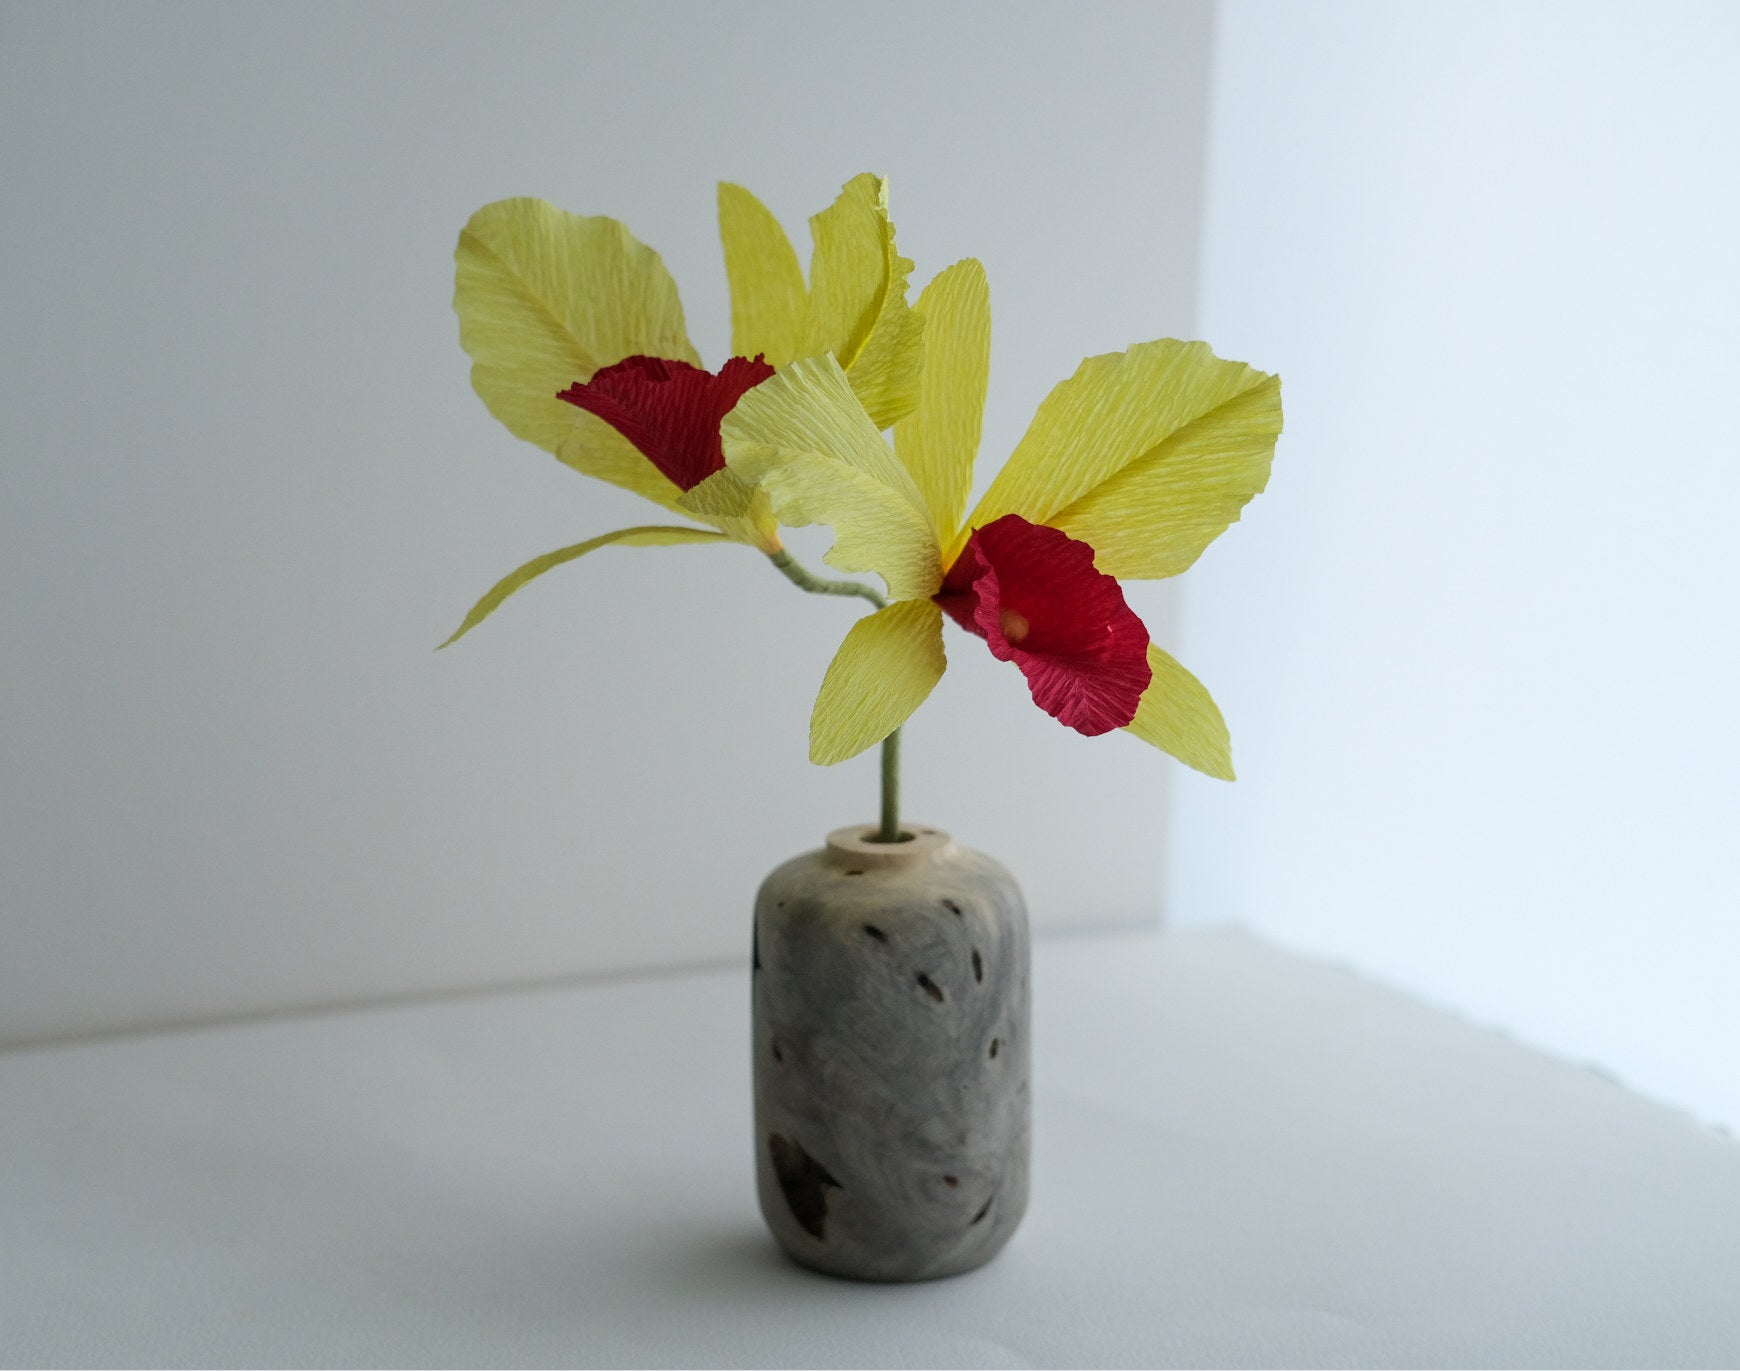
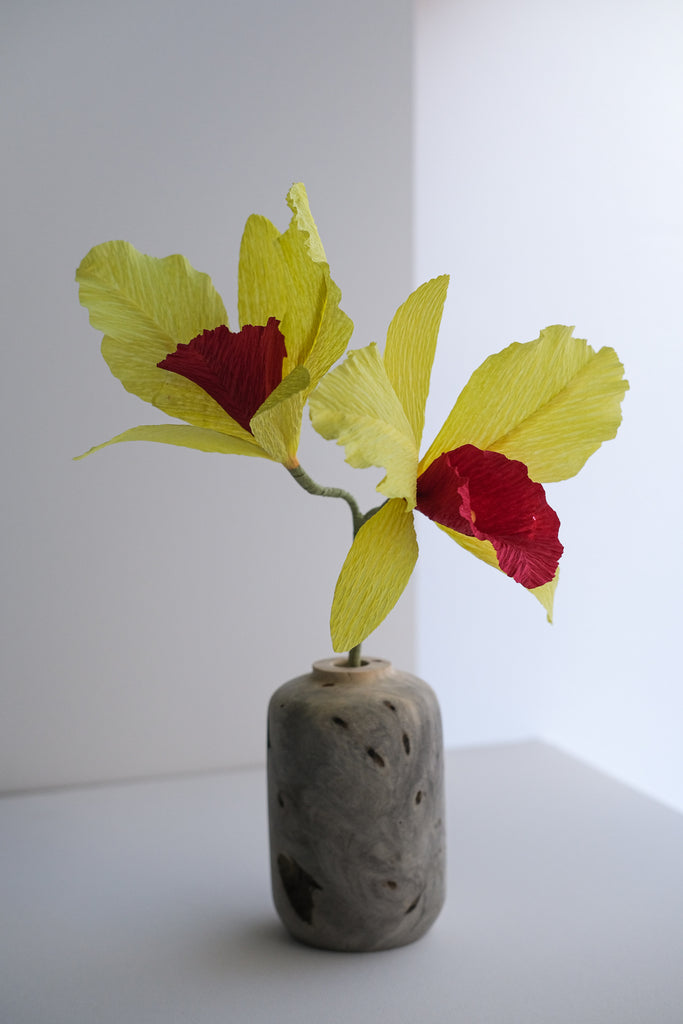
In this tutorial you are going to create a simple and beautiful paper Cattleya Orchid that can be used as a decor piece, a cake topper or as a hairpiece, you decide. Cattleyas are usually big, colorful and showy orchids. My color choice for this tutorial was a cheerful yellow one with big bold red lips.
If you make this flower, please take a picture and post it on Instagram. Make sure to tag, @cartefinicrepepaper and I @floresdaannita, so we can appreciate your work. I hope you like it and have some fun!
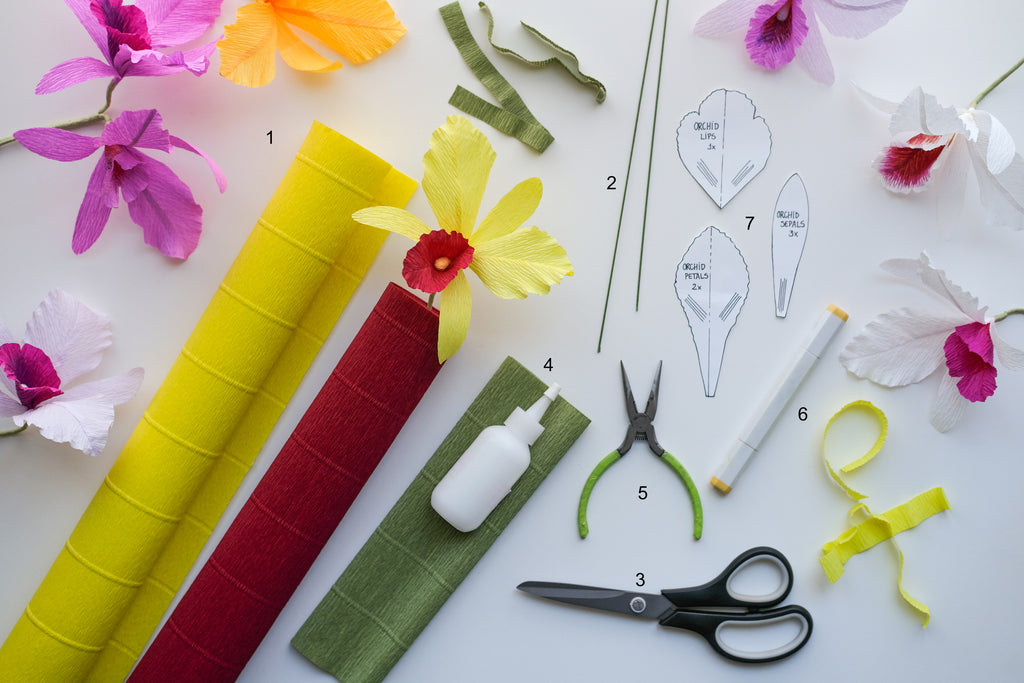
Materials & Tools
- Italian crepe paper 180g - Lemon 575, Red Velvet 586, Green Leaf 562
-
Floral wire 20 gauge
-
Scissors
-
PVA Glue
-
Wire cutter
-
Alcohol marker - Yellow
-
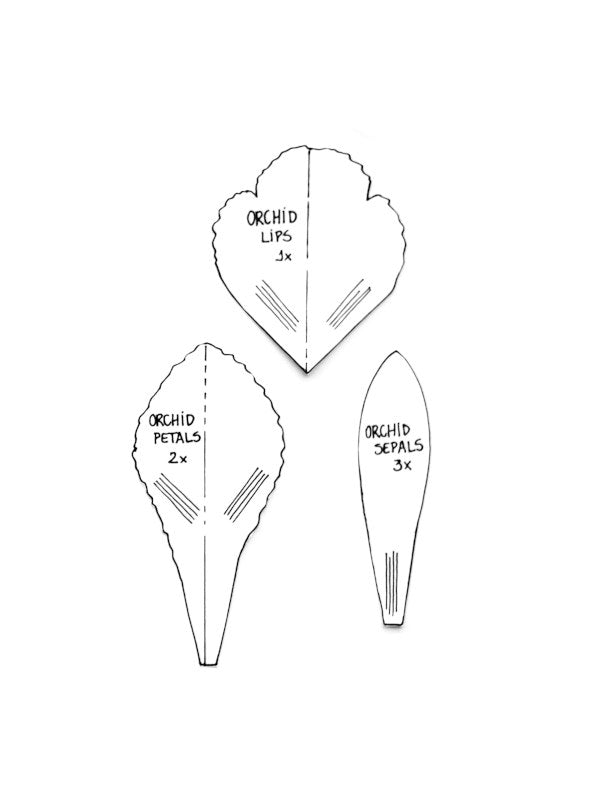
Templates
Instructions
Column
- You are going to start your Orchid by building the Column.
Cut a 7 inch piece of floral wire and fold the tip like a hook. Cut a strip of yellow crepe paper, stretch a little, apply glue and start wrapping the paper around the hook. What you are going to do here is a big cotton swab shape.
You can add a little bit of color to the column with an alcohol marker if you like. 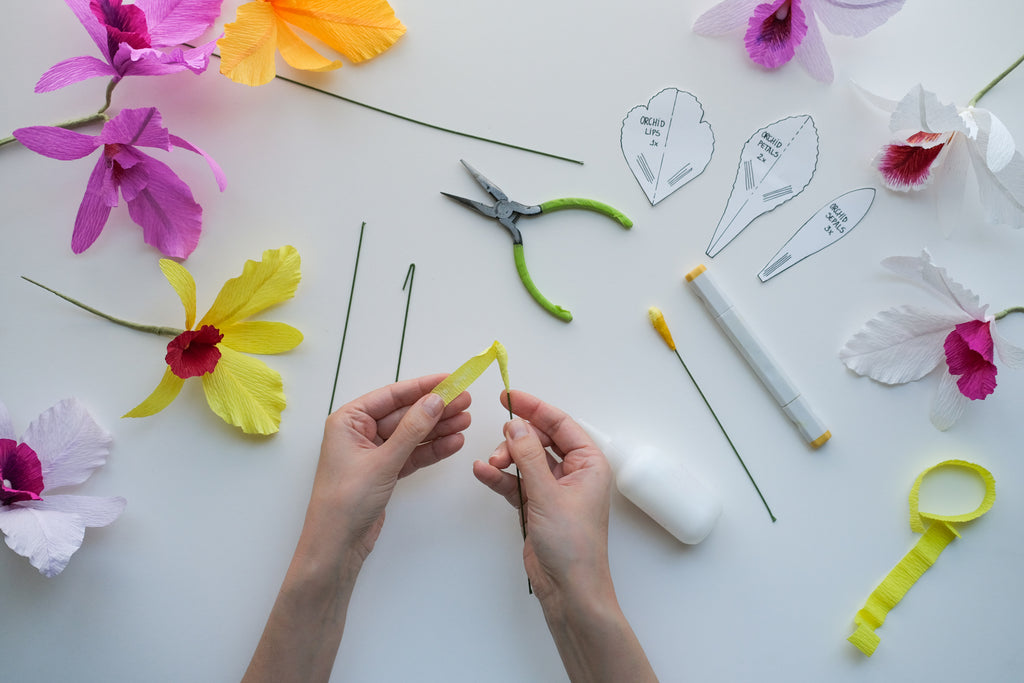
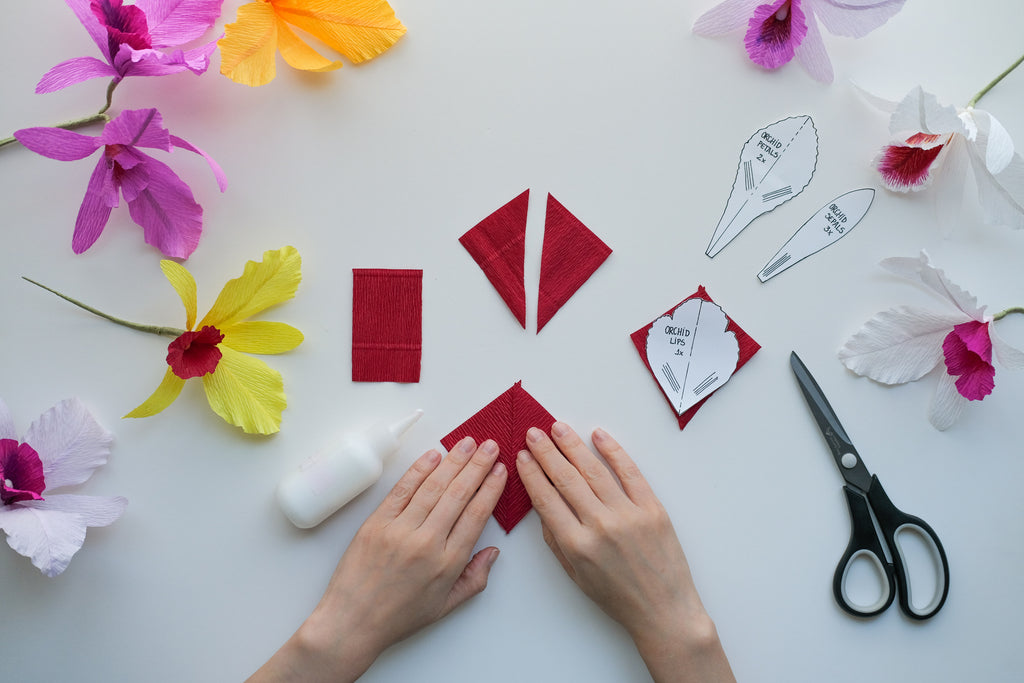
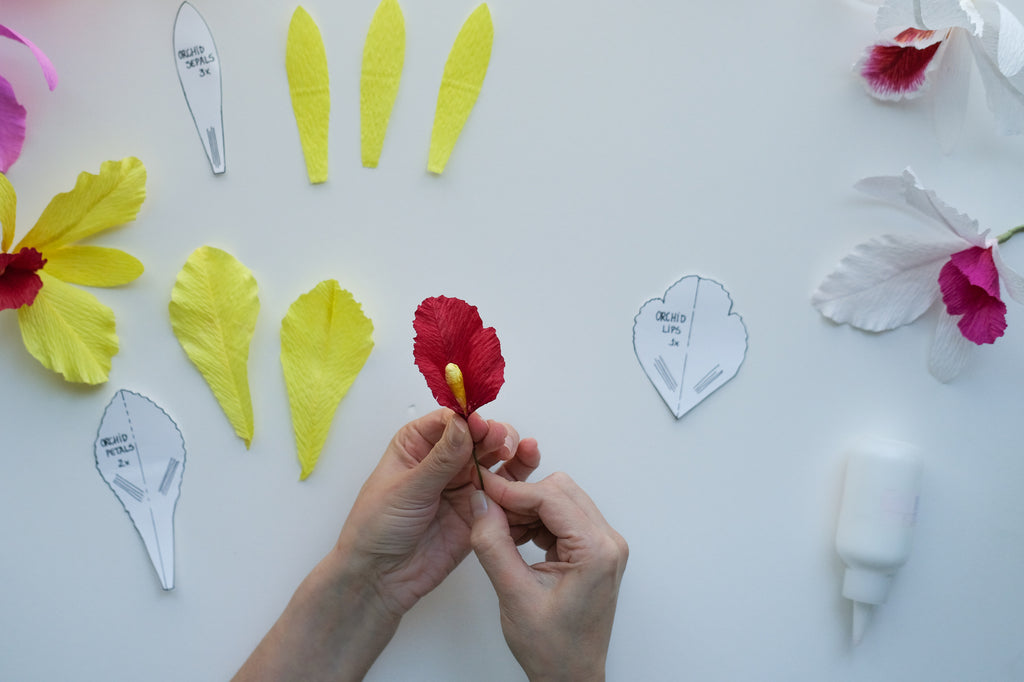
Lips
- To make the Lips, you are going to cut a 2x3 inches piece of red crepe paper, stretch a little and make a diagonal cut. You should now have two triangular shapes. Glue these two pieces as shown in the picture, paying attention to the direction of the paper texture. Wait till the glue dries and cut the lips shape using the template.
Petals and Sepals
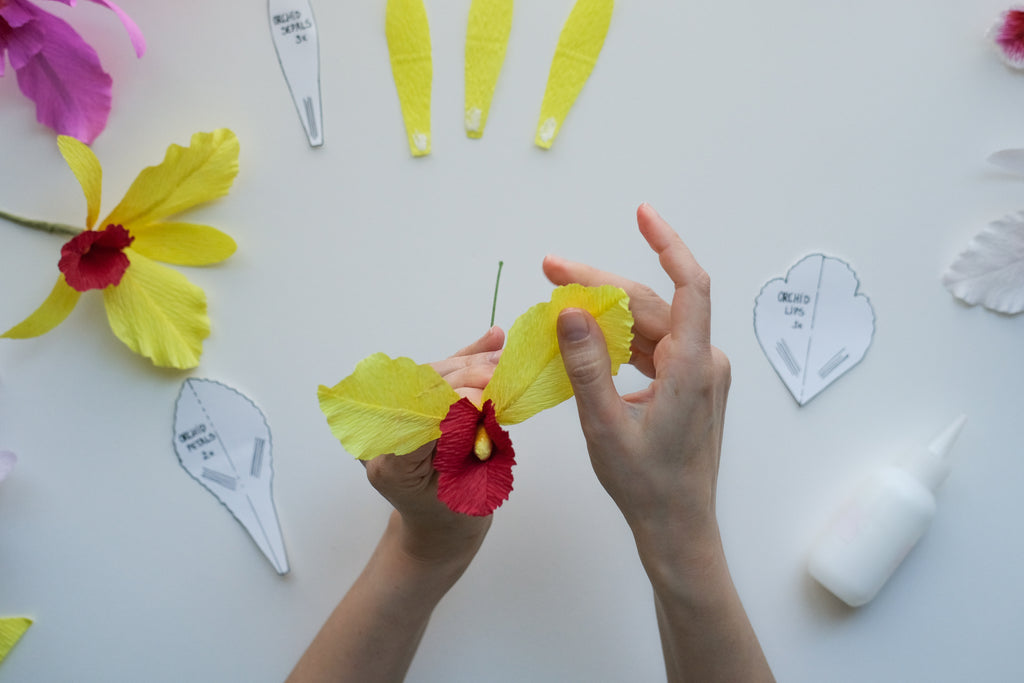
- To make the petals start by cutting an 8x4 inches piece of yellow crepe paper. Stretch a little, fold in a half and cut. Take one of the two pieces, fold in a half again and cut. Now make a diagonal cut as you did with the lips, but this time you are going to glue the triangular pieces facing each other. Pay attention on the direction of the paper texture. Let the glue dry and carefully open the triangles. What you have now are two shapes similar to kites. Cut your petals using the template.
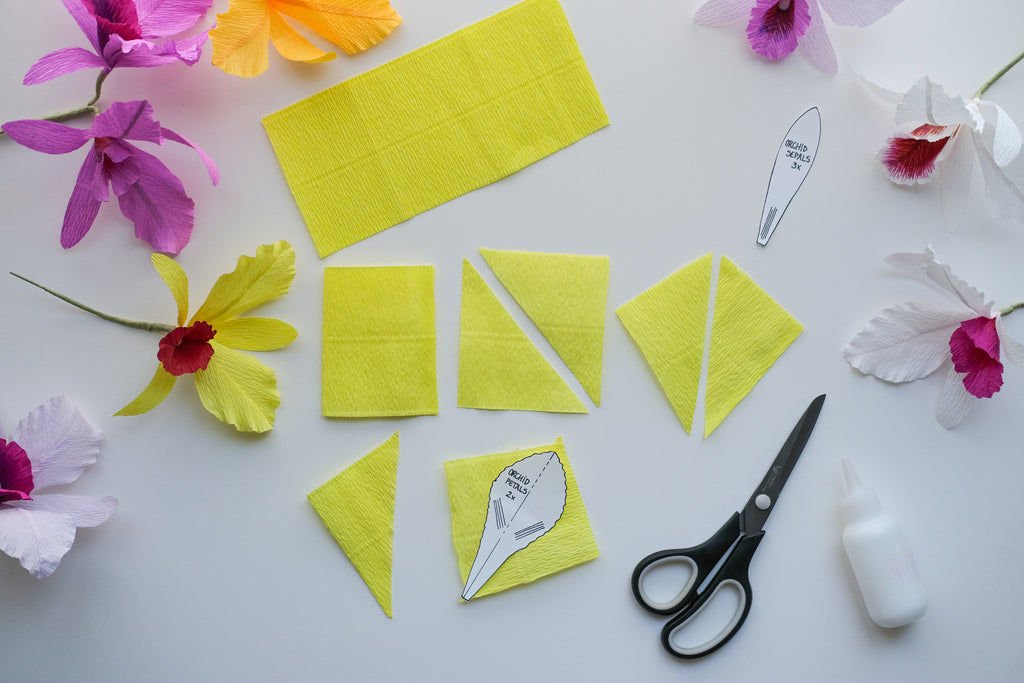
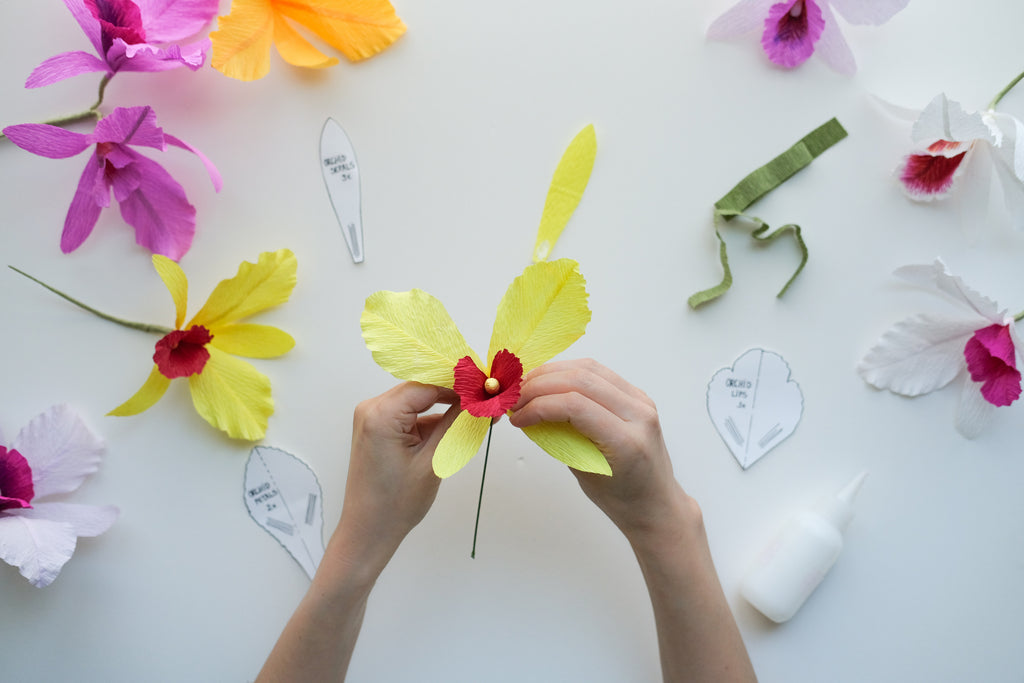
- For the sepals, take the other piece of yellow crepe paper and use the templates to cut three pieces.
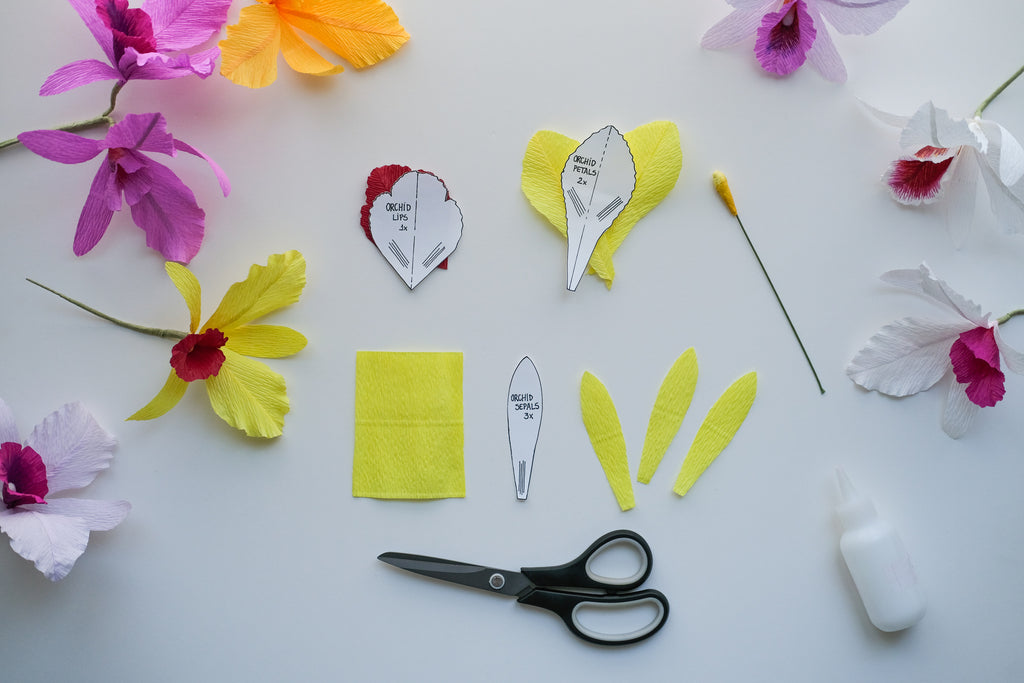
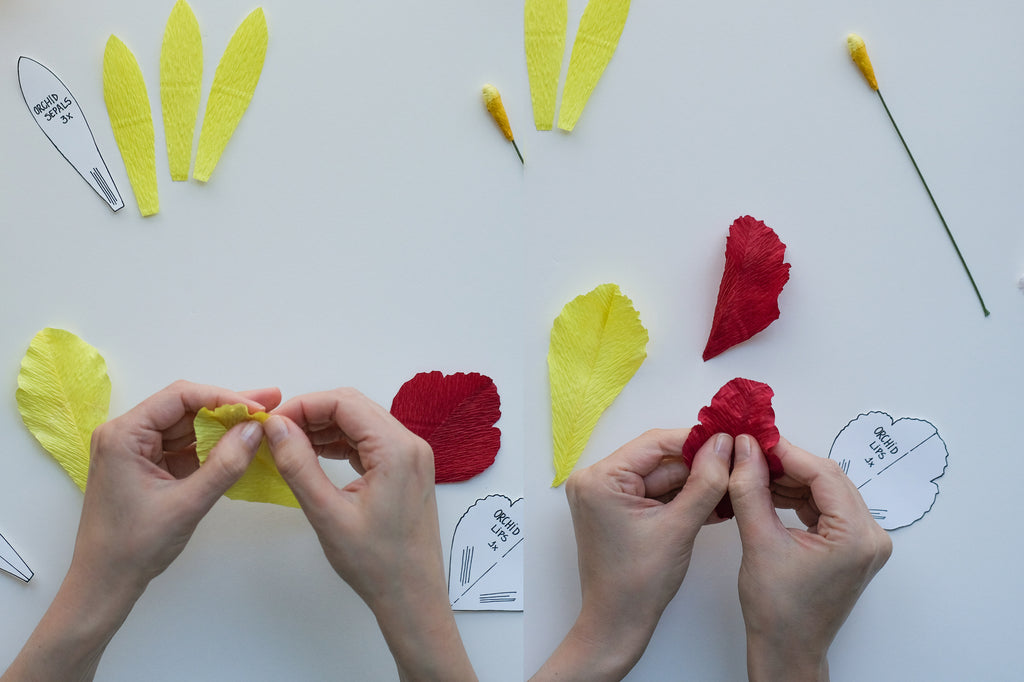
- Start by gently fluting the edge of the petals and the lips too. After you fluted the edges of the lips, press the center with your thumbs to cup it just a little.
Assembly
- Start by applying a little bit of glue on the base of the lips. Glue the lips around the column, like if the lips were hugging the column. Use your fingers to carefully pull the edges of the lips outward, like they were opening. Be careful to not rip the paper.
- Apply glue on the base of the petals and the sepals. You should attach the petals on the lips making them look like big bunny ears. Let the glue dry and use your fingers to gently pull the petals outward at the base and inward at the top.
- Now place the sepals in the gaps between the petals and the lips, one on top and two on the bottom. Use your fingers to bend the bottom ones outward and the top one inward.
Finishing
- To finish your flower, cut a strip of green crepe paper, stretch a little bit, apply glue and start wrapping the back of your orchid. Place the strip a tiny bit down, away from the base of the flower and go all the way down, wrapping the wire. Make another one so you have a pair of beautiful Cattleyas.
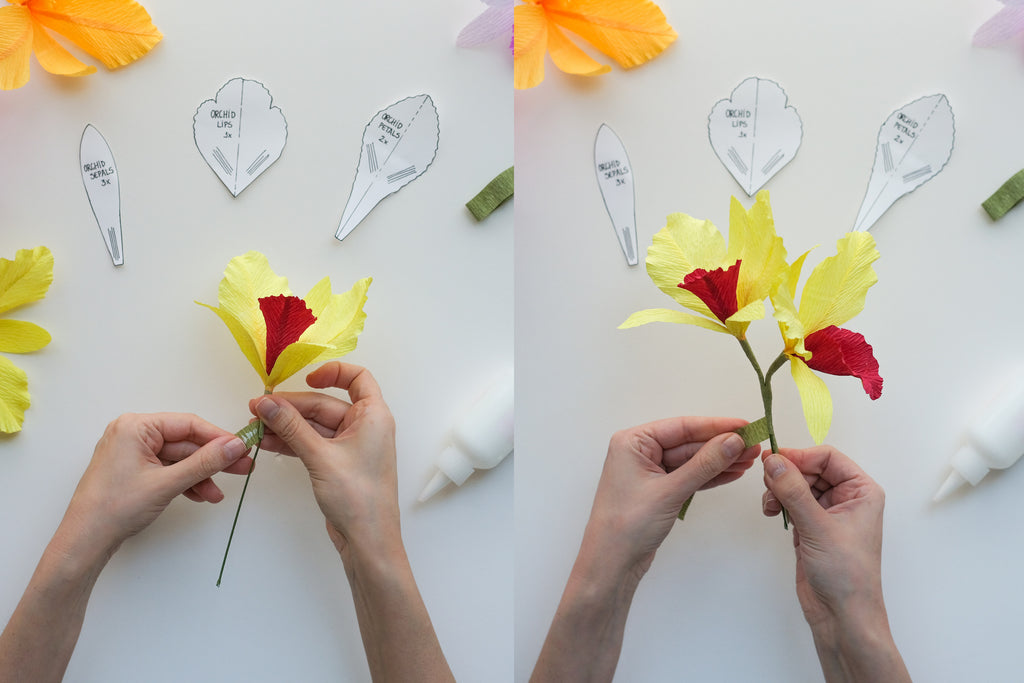
If you make more than one, attach the flowers as shown on the picture and add a longer piece of wire if you want to. 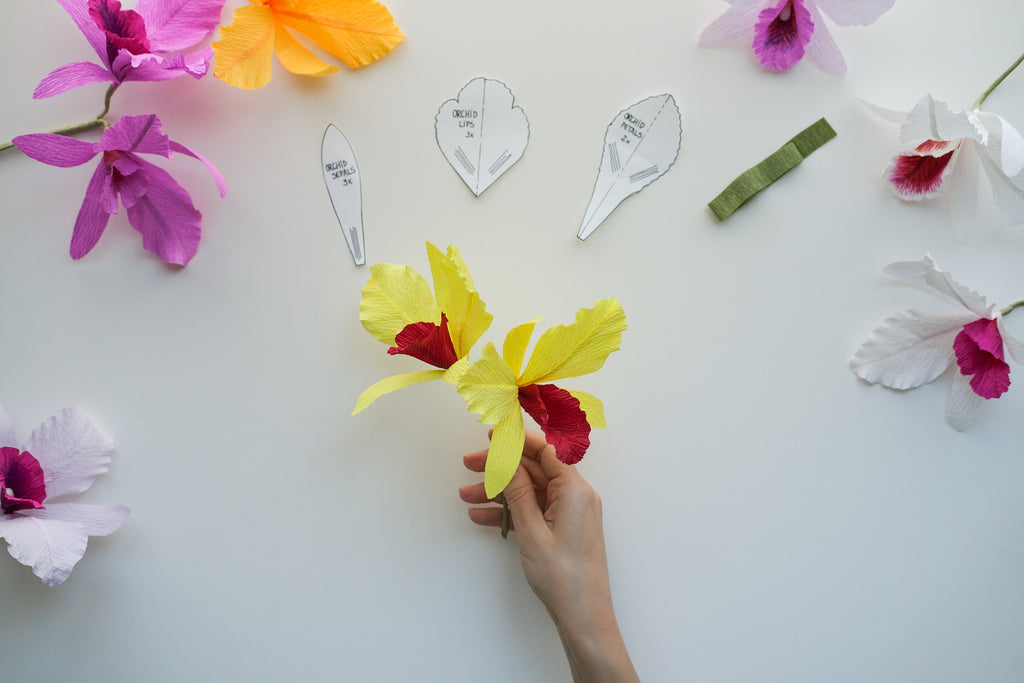
Congrats!
Now that you have a beautiful paper orchid, try it with other color combos! You can also make the same flower but laminating two sheets of paper together beforehand so it looks more realistic.
If you desire to share your flower on social media, please don't forget to mention and tag the artist and author of this tutorial. I would love to see the wonderful blooms made by you!
Thanks,
Anna - @floresdaannita