Your Cart is Empty
Get Free Shipping over $59 within the U.S. | Woohoo!
- Home
- Inspiration
- Shop
- Wedding Shop
- Contact
- NEW 90 Gram Crepe Paper
- 888 284 6532
- Login
- USD


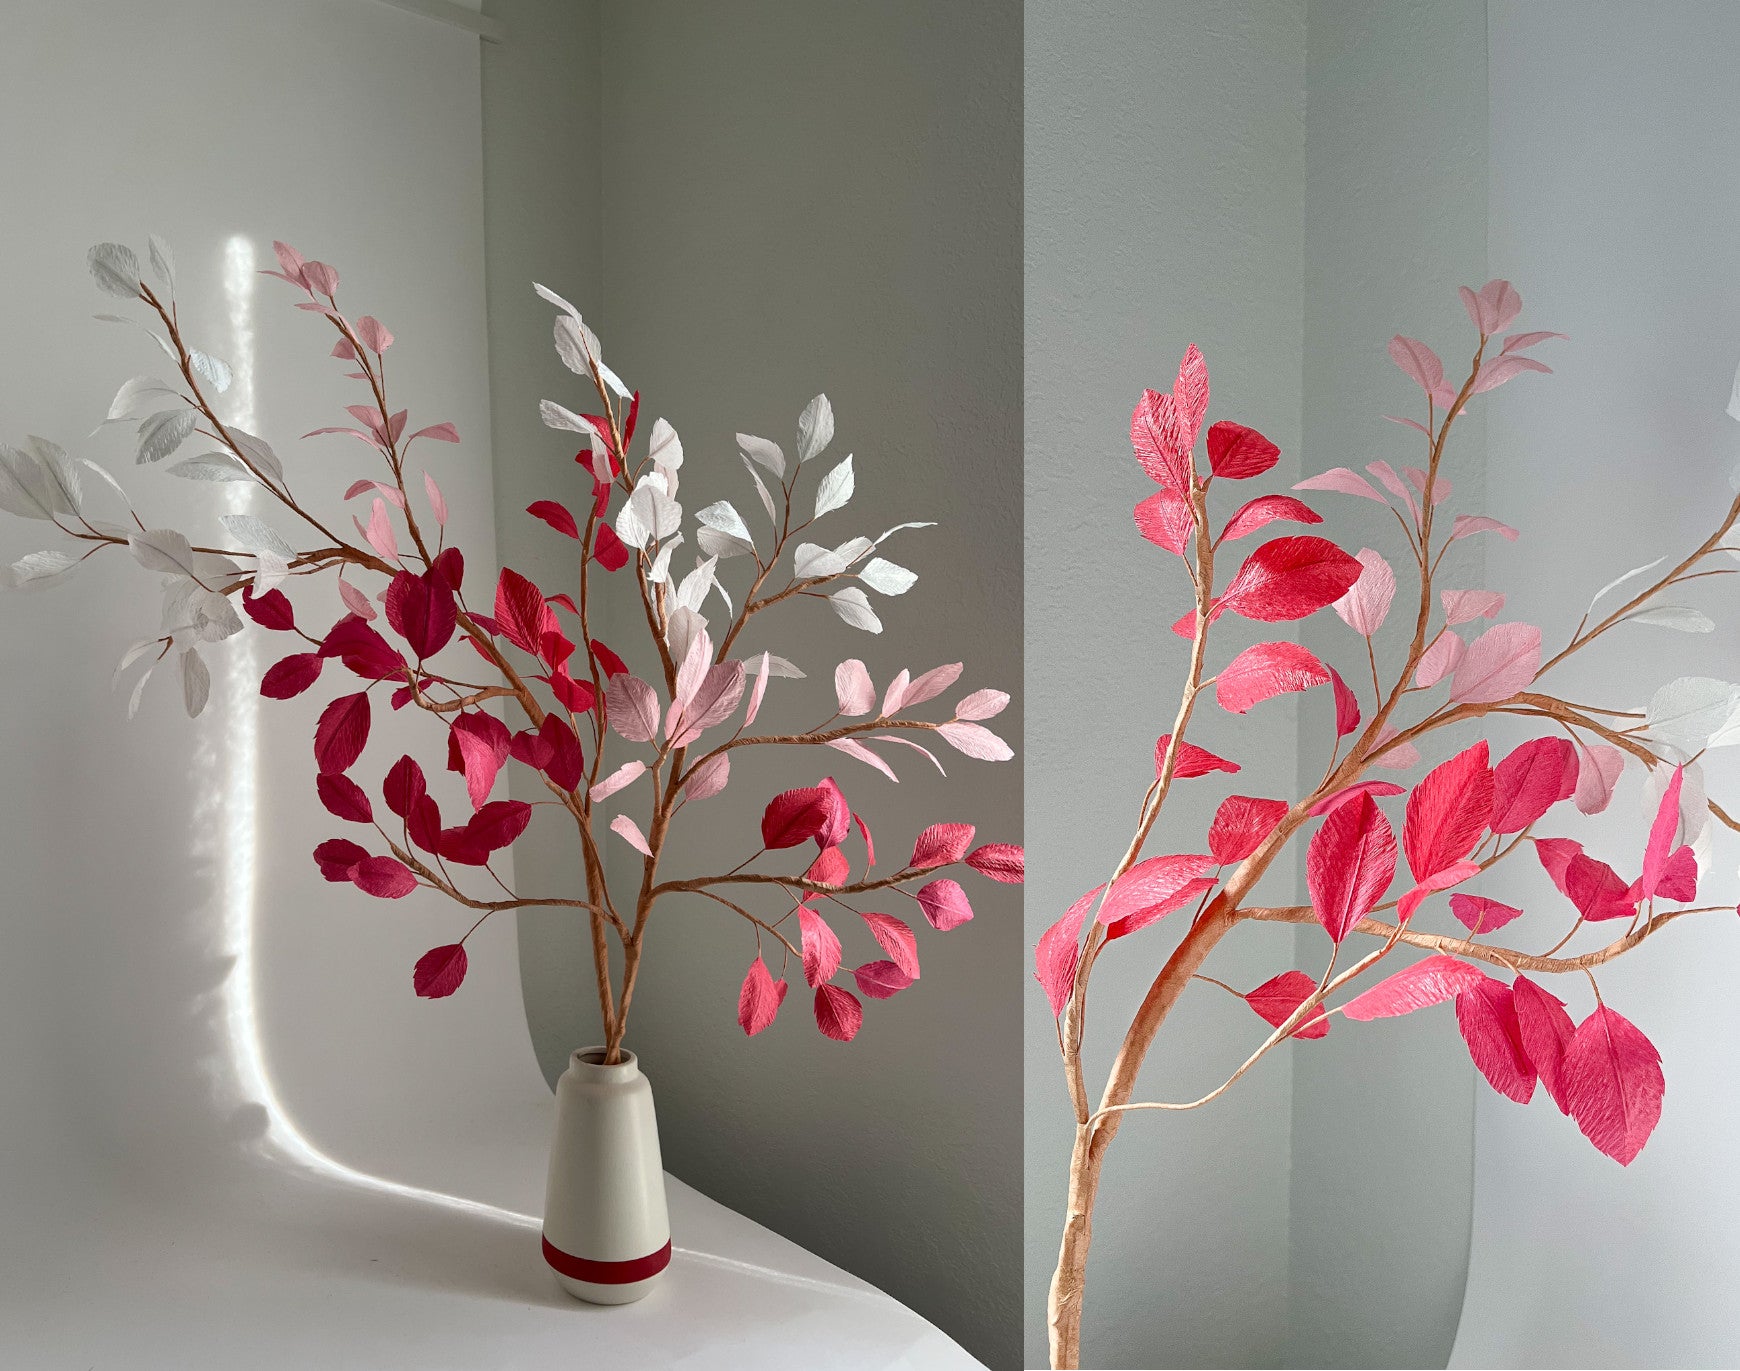

For this Valentine’s Day, ring it in with a gorgeous ombre pink, red and white leafy branch while learning basic skills that can be utilized to create realistic-based leaves and branches.
Materials:

Instructions:


9. Let’s cut some leaves! Fold one side over the other and cut a “D” shape. Cut varying heights and slight variation of widths all while keeping the general shape similar. Do this for all diamonds to create your leaves.

10. Optional: To add a touch of realism, cut delicate notches out as shown in the photos below. With or without this detail, your leaves will look beautiful!
11. Next, pull out your floral tape. Stretch the tape to activate the glue and then starting from directly below the bottom of the leaf wrap the wire going down about 2 inches.

12. Whew! Now that’s a lot of colorful leaves you’ve just brought to life! Let’s put these beauties together to create two lush, leafy branches. To make a branch, gather your roll of thick coiled wire / wired hemp, 18 gauge wire and approximately half of the leaves in each color variation.
Cut one main branch approximately 2 - 3 feet in length of thick coiled wire / wired hemp.
Next, cut the branches coming out of the main branch using variations of the 18 gauge and thick coiled wire / wired hemp ranging from 6 - 10 inches.
The key idea, if you’re looking to create an ombre branch, is to have a secondary branch for each color except for the lightest color which you’ll put at the top of the main branch.
Cut and lay out so you can visualize as shown below but keep in mind that once you start assembling, you may decide that another branch should be added or other changes need to happen to make it look how you prefer.

13. Now, start assembling the secondary branches with leaves. Attach the first leaf at the top of the first wire with floral tape. Spacing can vary depending on how dense you would like the branches to be with leaves. Set a few leaves of each color to the side to use as a filler on the assembly of the main branch.

14. Add leaves to all of your secondary branches and then take the tip of the main branch and create the same leaf structure as the secondary branches, just using the main branch instead. I used the lightest color here - white.
15. Take all of your branches and lay them out so you can start to assemble them all together.

16. Taking the main branch with the white leaves at the top, take your next color variation (#616) and, using floral tape, wrap at least 1 inch of the base to the main branch.
Be sure to wrap well since the branch will get heavy with all of the added weight.
Add the loose leaves to the main stem to ease into color changes and give more dimension.
Next, add your third color variation (#20E/1) to the main branch.

17. It’s time to add some support to the main branch. You will start by adding 18 gauge wire to the wrapping once you’re about 12-18 inches from the end of the main stem. For the branch I created, I added two 18 gauge wires (however you can add another if you feel like it needs it) after adding some loose leaves to the main branch and right before adding the fourth color variation (#547). Start wrapping in the added wire so it is secure and then attach the fourth color variation branch. Continue wrapping the added wires in with the main branch and fourth added branch. Add some loose leaves to the main branch and finally add the last color variation (#17A/6) branch.
Once this is added you may feel like the branch needs further strength. If so, I would recommend adding another piece of the coiled wire / hemp wire, in addition to another 18 gauge wire, to not only give support but also add thickness to the end, much like a real tree branch would have. Snip any excess wire ends so they are even at the bottom of the main branch.
Add a couple layers of floral tape over the part of the stem where you have just added the additional wires to secure completely in place and to give the smoothness of a real branch. Now fluff and shape your secondary branches and leaves. Add to a sturdy vase or hang on the wall for a colorful display!
Tips: To create natural looking bumps, add a small size ball of tissue or scrap floral tape and wrap over it with floral tape until it looks like a real branch. You can also use Pan Pastel or acrylic paint to add color variations on the branches to give further depth to your stunning work of art!

Now that you’ve completed one branch, you can create a second using the remaining
leaves!
I hope you have learned something new and enjoyed this Valentine’s Day Leafy Ombre Branch tutorial!
Please feel free to reach out to me via Instagram @TheFloweringTable with any questions you might have!

Happy Making!
Dana Tezanos-Pinto
The Flowering Table
www.thefloweringtable.com
@TheFloweringTable
Comments will be approved before showing up.